Convert DPI Online
Change Image DPI while preserving quality. Our privacy-focused tool works right in your browser—no uploads, no watermarks.
Drag & Drop your images here
Supports JPG, PNG, WEBP (Max 10 files, 30MB each)
Selected Files 0
Conversion Settings
Converted Images 0
Convert DPI Online
Changing an image's DPI means you are editing a piece of metadata (information about the image) that tells a printer how densely to place the pixels on a physical page. It does not change the actual pixel dimensions of the image itself.
It's a measurement of print resolution. It specifies how many individual dots of ink a printer will place within one linear inch of paper.
Change Image DPI — Fast & Secure
Everything you need to DPI convert your images quickly and securely.

Privacy Protected
Your images are processed in your browser and never uploaded to our servers. Your privacy is 100% guaranteed.

First Process
Our tool processes images directly in your browser for lightning-fast convater without waiting in queues.

Batch Processing
Upload multiple images at once. Save time by processing your entire image collection in one go.

File Transfer Encryption
All file transfers are encrypted for maximum security, ensuring your images remain private and protected.

It's Free For All
No hidden costs, no watermarks, no registration required. Our image dpi convater is completely free to use for everyone.

Mobile Friendly
Optimized for all devices. dpi convater images on your phone, tablet, or desktop with the same great experience.
The Ultimate Guide to Convert DPI: Everything You Need to Know
Welcome to the most comprehensive guide available on how to convert DPI. Whether you are a professional graphic designer, an amateur photographer preparing prints, a developer looking to optimize assets, or simply someone trying to upload a passport photo that meets strict governmental requirements, understanding how to handle and convert image DPI is absolutely crucial.
In this extensive guide, we will dive deep into what DPI is, why it matters so much in the digital and physical world, the critical differences between DPI and PPI, and how you can use our advanced, browser-based tool to effortlessly convert DPI for your image files without compromising on privacy or quality.
What Exactly is DPI
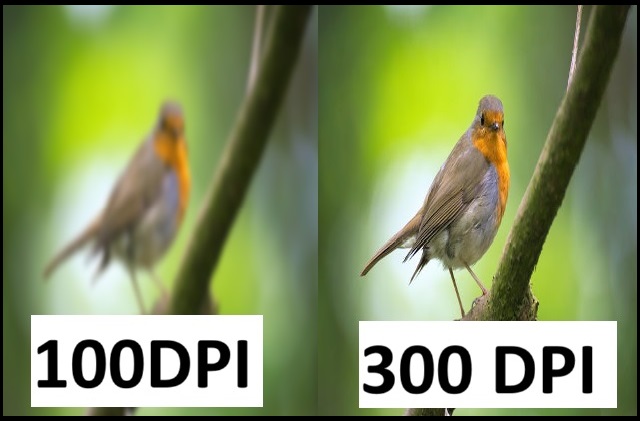
DPI stands for Dots Per Inch. Historically, this term originates from the printing industry. When a physical printer puts an image onto paper, it creates that image by depositing tiny dots of ink. The DPI value simply tells the printer how many of these tiny dots it should place within a single linear inch. If you have an image set to 300 DPI, the printer will pack 300 dots into every inch of the printout.
The higher the DPI, the denser the dots. Denser dots mean finer detail, sharper edges, and a smoother transition of colors, resulting in what we perceive as a "high-quality" or "high-resolution" print. When you decide to convert DPI from a lower number (like 72) to a higher number (like 300), you are essentially changing the instructions embedded within the image file, telling whatever output device reads it to pack the pixels closer together upon physical output.
DPI vs. PPI: Clearing the Eternal Confusion
Before you use any tool to convert DPI, it is highly beneficial to understand the difference between DPI (Dots Per Inch) and PPI (Pixels Per Inch). These terms are frequently used interchangeably in everyday conversation and even in professional software, but technically, they refer to different things:
- PPI (Pixels Per Inch): This refers to the digital screen. A digital screen is made up of pixels. PPI describes the resolution of your digital image. When you view an image on a monitor, the PPI matters for screen clarity.
- DPI (Dots Per Inch): This is strictly a printing term. It refers to the physical ink dots on a physical piece of paper.
However, because the digital representation of an image directly dictates how it will be printed, most software (including Adobe Photoshop and web-based utilities) use the term "DPI" to mean the intended printing resolution. When our tool allows you to convert DPI, it is updating the metadata of the image file (the EXIF or headers) that dictates this "pixels per inch" instruction for printers.
Why Do You Need to Convert DPI?
You might wonder why you can't just leave your images as they are. There are several critical scenarios where you absolutely must convert DPI to achieve your desired outcome.
1. Professional Printing and Publishing
The most common reason people need to convert DPI is for printing. Commercial printing presses, magazine publishers, and even high-end home photo printers require an image to be dense enough to look sharp on paper. The industry standard for high-quality print is 300 DPI. If you send a 72 DPI image to a professional printer, it will likely print out blurry, pixelated, and completely unusable. By using a tool to convert DPI to 300, you are ensuring the print software scales the image to the correct physical dimensions.
2. Official Documents, Passports, and Visas
Governments and official institutions have strict digital guidelines. If you are uploading a photo for a passport, visa, or official ID, the portal will often explicitly require the image to be "exactly 300 DPI" or "exactly 600 DPI". Even if your photo's pixel dimensions are perfect, if the metadata reads 96 DPI, the automated system will reject it. Using our tool to convert DPI allows you to seamlessly update this metadata so your application is accepted on the first try.
3. Digital Art and Graphic Design
Graphic designers frequently work across different mediums. A logo designed for a website might only need to be 72 DPI. But if that same logo is going to be printed on a massive billboard or a small business card, the designer must convert DPI to match the output requirements. Managing DPI correctly ensures that brand assets remain crisp and professional regardless of where they appear.
Standard DPI Sizes and Their Best Use Cases
When you decide to convert DPI, you need to know what target number to enter. Here is a breakdown of the industry standard DPI settings:
- 72 DPI / 96 DPI: These are the legacy standard resolutions for the web and screen viewing. If an image is only ever going to be seen on a monitor, phone, or tablet, 72 or 96 DPI is perfectly fine. It keeps the file size relatively manageable and looks great on digital displays.
- 150 DPI: This is generally considered the minimum threshold for readable print. It is often used for newspapers, draft prints, or large format printing (like banners and posters) that will be viewed from a distance. You might convert DPI to 150 if you want a decent print but need to keep the print spooling fast.
- 300 DPI: The golden standard for professional printing. Magazines, brochures, high-quality photographs, and official document submissions all require 300 DPI. If in doubt about printing, convert DPI to 300.
- 600 DPI to 1200 DPI: These ultra-high resolutions are used for fine art reproduction, archival purposes, and professional line art or typography where absolute crispness is required without any anti-aliasing.
How Our "Convert DPI" Tool Works
Our online Convert DPI utility is designed to be the fastest, safest, and easiest way to change your image resolution. Here is a step-by-step breakdown of how you can use it:
- Set Your Target: At the top of the tool, you will see an input field for the "Target DPI". By default, this is set to the printing standard of 300. You can type in any number you need or use the convenient preset dropdown.
- Select Your Files: You can click the large drag-and-drop zone to browse your computer or mobile device, or simply drag the files directly from your folder onto the designated area. You can upload up to 10 files simultaneously.
- Instant Client-Side Processing: This is where our tool shines. Unlike older websites, we do not upload your images to our servers. All processing happens entirely within your web browser using JavaScript. The script reads the binary data of your image, locates the specific header that stores the DPI information (like the JFIF header for JPEGs or the pHYs chunk for PNGs), and overwrites it with your new target DPI.
- Download: Within milliseconds, your files are processed. You can download them individually using the buttons on each file card, or click "Download All (ZIP)" to get a neatly packaged archive of all your converted images.
The Technical Side: Metadata vs. Resampling
It is important to understand what happens technically when you convert DPI using our tool. There are two ways to think about image resolution: altering metadata and resampling.
Changing Metadata (What our tool does)
Our tool changes the DPI by altering the image's metadata. Think of metadata as the "tag" attached to your image file. If you have an image that is 3000 x 3000 pixels, and you use our tool to convert DPI from 72 to 300, the image remains exactly 3000 x 3000 pixels. No pixels are created or destroyed. The file size remains effectively identical. You are simply changing the instruction tag. Now, when you print it at 300 DPI, it will print at 10 inches by 10 inches (3000 / 300 = 10). If it was 72 DPI, it would try to print at a massive 41.6 inches. Changing the metadata is non-destructive and safe.
Resampling (Upscaling/Downscaling)
Some tools "resample" an image when they convert DPI. This means they actually stretch the image, inventing new pixels (upscaling) or throwing pixels away (downscaling). Resampling to increase DPI often results in a blurry or "muddy" image because the computer is guessing what colors the new pixels should be. Our tool strictly modifies the metadata, ensuring that the original pixel integrity of your beautiful photograph or design is 100% maintained.
Benefits of Using Our Browser-Based DPI Converter
There are countless tools on the internet that claim to convert DPI, so why should you use ours?
- Absolute Privacy and Security: Because the script runs locally in your browser, your files never leave your device. You don't have to worry about your personal photos, official documents, or confidential corporate graphics being stored on a random server.
- Blazing Fast Speed: Bypassing server uploads means the conversion happens as fast as your computer can process the data—usually in fractions of a second, even for heavy 30MB files.
- Batch Processing: Time is money. Instead of converting files one by one, our tool allows you to convert DPI for up to 10 images at once, streamlining your workflow.
- Generous File Limits: While many free tools cap you at 2MB or 5MB, we allow up to 30MB per file, ensuring high-resolution raw exports can be processed without compression errors.
- Mobile Friendly: Need to convert DPI on the go? Our responsive Bootstrap design ensures the tool works flawlessly on smartphones and tablets.
Conclusion
Understanding image resolution doesn't have to be complicated. Whether you are prepping a family photo for a canvas print, submitting documentation for a visa, or formatting brand assets, the need to convert DPI is an unavoidable step in digital asset management.
By utilizing our free, secure, and instant online tool, you can seamlessly convert DPI and ensure your images meet the strict requirements of professional printers and institutional software alike. Bookmark this page, rely on our secure client-side processing, and never struggle with DPI resolution errors again!
Convert DPI in 3 Simple Steps
Change Image DPI without sacrificing quality—drag, adjust, download.
Upload Images
Click the "Select Files" button or drag and drop your images into the upload area. You can select multiple files at once for batch processing.
Adjust Settings
Use the manual DPI input to choose your preferred balance between file size and image quality. You can also choose to keep or remove metadata.
DPI Change & Download
Click the "DPI Change Images" button and wait a few seconds. Once processing is complete, download your optimized images individually or all at once.
Why Choose Our DPI Converter
Find answers to common questions about our image DPI Converter.
Privacy First Approach
Unlike many online tools that upload your images to their servers, our dpi convater works entirely in your browser. Your images never leave your device, ensuring complete privacy and security.
Lightning Fast Processing
Our advanced algorithms work directly in your browser, eliminating upload and download wait times. Process dozens of images in seconds, not minutes.
Precise Quality Control
With our intuitive quality slider, you have complete control over the dpi change level. Preview the results before downloading to ensure perfect balance between quality and file size.
No Registration Required
Use the tool instantly—no sign-ups or personal data needed. Your privacy is respected. We're committed to providing the best user experience.
Frequently Asked Questions
Find quick answers to common questions about our Converter.
What is DPI?
DPI (Dots Per Inch) is a measurement of printing resolution. It refers to the number of individual dots of ink a printer can place within a one-inch line. In a digital context, it's often (and sometimes incorrectly) used interchangeably with PPI (Pixels Per Inch), which defines the pixel density of a digital image on a screen.
What image formats does your compressor support?
Our tool supports all major image formats including JPG, PNG, GIF, and WebP. We use format-specific optimization algorithms to ensure the best results for each file type while maintaining quality.
Will increasing the DPI make my low-resolution image look better for printing?
No. This is the most critical point to understand. If you have a small, low-resolution image (e.g., 500x500px) and you change its DPI from 72 to 300 without resampling, you are just telling the printer to print those 500 pixels in a very small space (~1.6 inches). If you enable resampling to make it print at a larger size, the software will invent new pixels (interpolation), resulting in a blurry, blocky, and low-quality print. You cannot create detail that was never there.
What does a DPI converter actually do?
When you use a simple DPI converter, it primarily changes a number in the image's header information. It does not add new detail or information to the image.
How do you ensure my images remain private?
All processing occurs in your browser - we never upload your images to our servers. Your files stay entirely on your device during compression. We use Web Workers for secure, sandboxed processing that can't access other files or data on your computer.